Building round, 3D delts takes more than adding another overhead press to your program. You want to develop the front, side, and rear heads, but that does not mean giving each one an equal amount of direct work.
My top three shoulder exercises are the machine shoulder press, cross-body cable Y-raise, and reverse pec deck. Each targets a different part of the shoulder. Exercise scientist Dr. Mike Israetel has three excellent picks of his own, and some of his technique cues completely changed how these movements felt for me.
The biggest takeaway? Prioritize the side delts, use a generous range of motion you can control, and make the target muscle work rather than just moving the weight.
Table of Contents
- Key Takeaways
- Shoulder Training Fundamentals: Give the Side Delts Priority
- Front Delts: Machine Shoulder Press or EZ-Bar Front Raise
- Side Delts: Cross-Body Cable Y-Raise or Super-ROM Lateral Raise
- Rear Delts: Reverse Pec Deck or Super-ROM Reverse Cable Fly
- Finish the Last Negative as Carefully as the First
- The Three Exercises I Would Start With
Key Takeaways
- Prioritize side-delt training while accounting for the shoulder work already provided by chest and back exercises.
- My top picks are the machine shoulder press, cross-body cable Y-raise, and reverse pec deck.
- Use a comfortable, controlled range of motion rather than sacrificing technique to lift more weight.
- Complete the final lowering phase with the same control you would use before another rep.
Shoulder Training Fundamentals: Give the Side Delts Priority
A common shoulder-training mistake is giving the front delts too much volume. They already get plenty of stimulation from chest pressing, so more direct front-delt work is not always the missing ingredient.
A German study from 1990 reported that bodybuilders had roughly five times the front-delt size of non-lifters, compared with about three times the side-delt size. That comparison fits a pattern we often see in the gym: front delts get a lot of attention, both directly and indirectly.
Mike takes that point even further. In his view, rear-delt isolation can also receive more attention than necessary when someone is already training their back effectively. For the visual impression of big, wide shoulders, he puts the side delts first.
He suggests that 70 to 90 percent of direct delt training could go toward the side delts. That is his prioritization recommendation, not a universal percentage established by the study. The useful principle is to account for the work your shoulders already receive:
- Front delts: Get substantial stimulation from chest pressing.
- Rear delts: Can receive considerable work during back training.
- Side delts: Deserve a major share of dedicated shoulder work when width and roundness are the goal.
The other heads still help complete the 3D look. They just do not automatically need the same amount of isolation work.
Front Delts: Machine Shoulder Press or EZ-Bar Front Raise
My Pick: Machine Shoulder Press
The machine shoulder press is my number one front-delt exercise for two main reasons: stability and the ability to push hard.
Being seated with your torso supported reduces the balance demands of the movement. That lets you focus more on pressing with your shoulders. A good machine also makes it easier to approach failure without worrying about dropping dumbbells or having your technique fall apart.
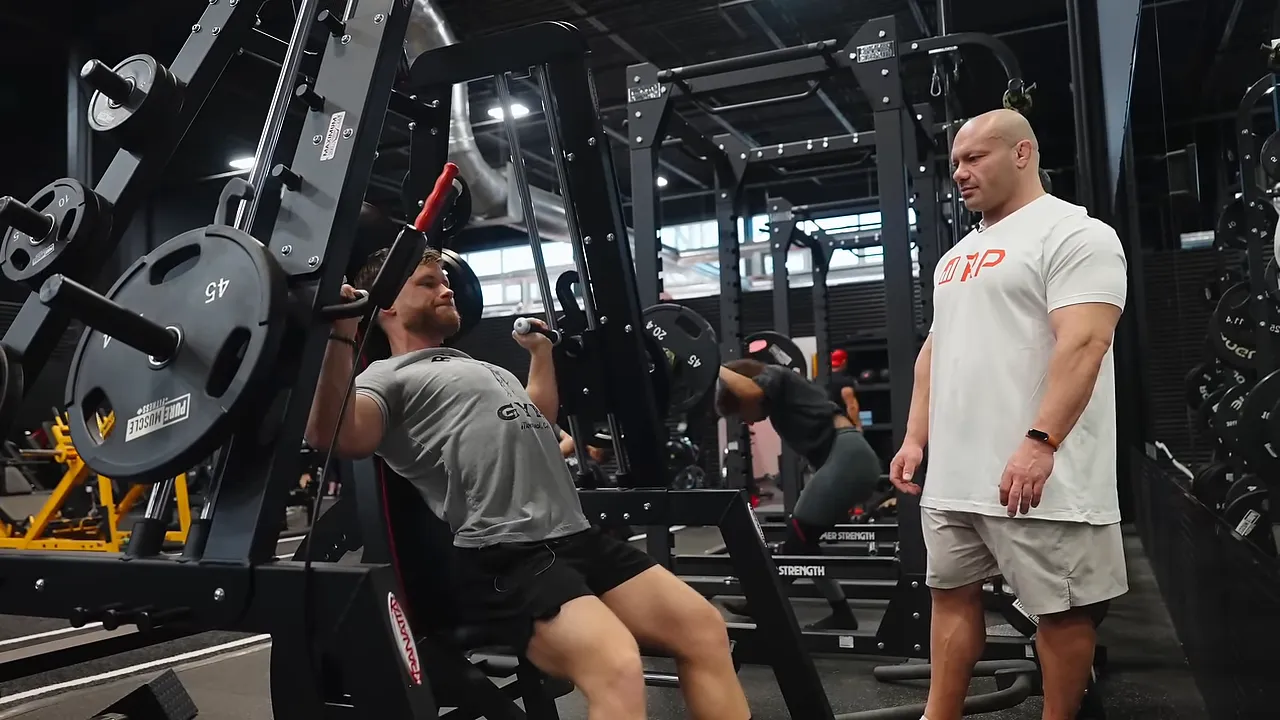
I particularly like the Panatta machine we used because it allows a large range of motion and a substantial stretch on the front delts at the bottom. Its arms also move independently, so each shoulder has to contribute rather than letting the stronger side take over.
You do not need that exact machine. Any well-designed shoulder press machine that fits you comfortably can get the job done.
- Rep range: I typically use 6 to 10 reps.
- Lowering phase: Bring the handles down under control into a comfortable stretch.
- Bottom position: Try a deliberate pause rather than immediately bouncing into the next rep.
- Alternative: A seated dumbbell shoulder press also makes each arm work independently.
Training with Mike reminded me how humbling a pause in the stretched position can be. I usually favor a more continuous-tension style, but slowing down and pausing made the same movement feel very different. Expect to use less weight when you make that change. That is not a problem if the shoulders are doing better work.
Mike’s Pick: EZ-Bar Front Raise
Mike’s choice is an EZ-bar front raise. Unlike a shoulder press, it isolates the front delts without asking the pecs and triceps to contribute to another compound pressing movement.
That makes it a useful option when your triceps already have plenty of work, your pecs are sore, or more pressing simply does not fit well into your training. It is an alternative to consider, not a reason to push through shoulder-joint pain.
His ideal setup would allow the hands to travel behind the torso, such as a suitable FreeMotion machine, to load the front delts in a deeper stretch. But the EZ-bar version is an accessible alternative.
- Stand tall and keep your chest up rather than letting it cave forward.
- Maintain a nearly straight, fixed elbow position. Think of raising the whole arm, not curling the bar.
- Lift the bar high, continuing above shoulder height through a comfortable range.
- Lower slowly, maintaining control as the bar passes through the middle of the movement.
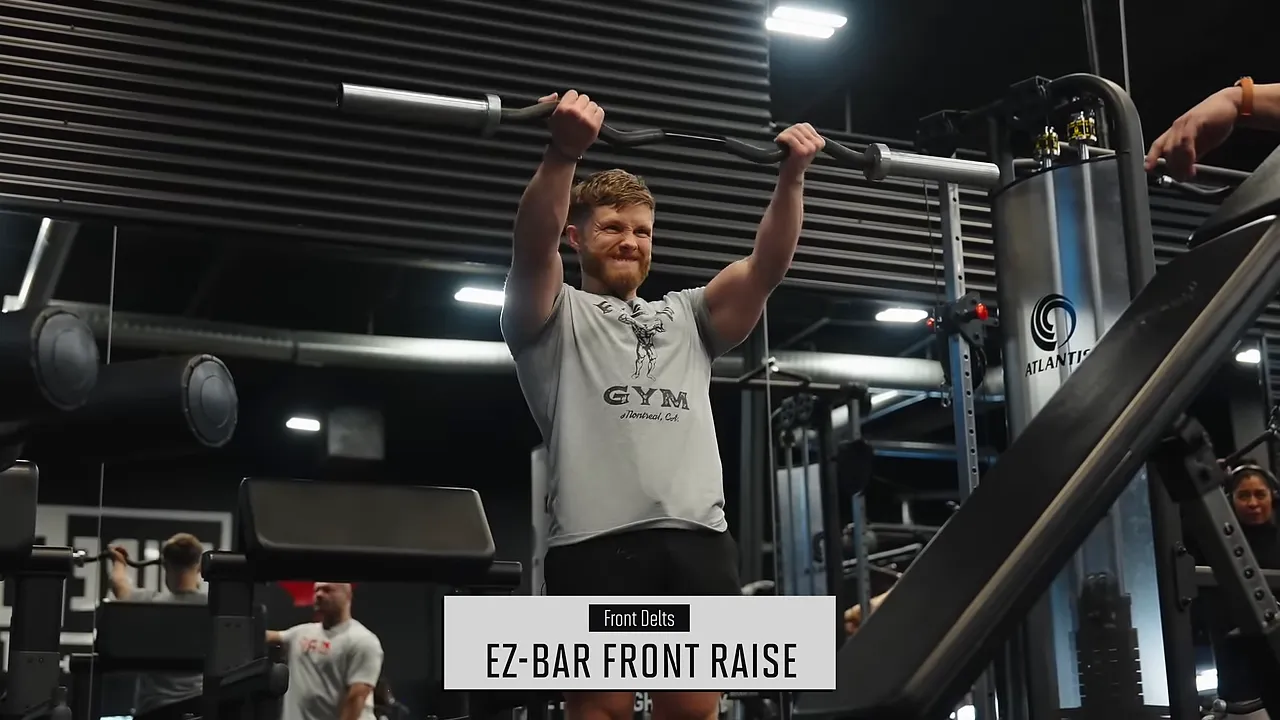
Mike uses 10 to 20 reps, a relatively explosive lift, and a controlled four- to five-second lowering phase. The key is not to let the bar fall through the hardest part.
He emphasizes the section from roughly 45 to 135 degrees of arm elevation. Stopping every rep at shoulder height leaves out part of that range.
Going higher is not automatically dangerous just because the arms pass shoulder level. The important distinction is whether you can perform the movement comfortably and under control. Do not force a painful range.
With that slower negative and larger range of motion, this gave me one of the craziest front-delt pumps I have ever had. It really does not take much weight.
Side Delts: Cross-Body Cable Y-Raise or Super-ROM Lateral Raise
Mike’s Pick: Super-ROM Lateral Raise
The super-ROM lateral raise starts like a regular dumbbell lateral raise, with one simple difference: you keep going above shoulder height.
Instead of stopping when your arms reach parallel to the floor, continue upward into a high, overhead position through a range that feels natural.
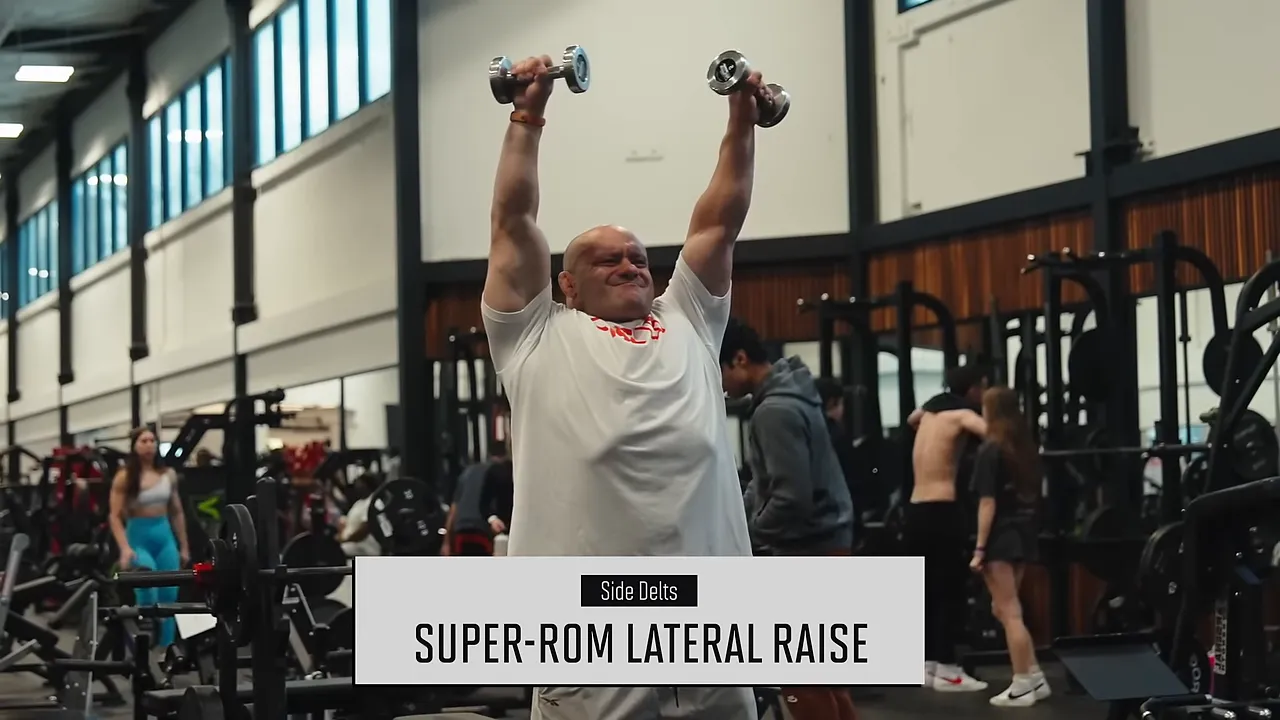
Hand orientation matters here. Mike cues keeping the pinkie side of the hand relatively high rather than immediately turning the movement into a thumbs-up raise. The reasoning is that a pronounced thumbs-up position shifts the movement toward the front delts, while the less thumbs-up position better matches the side-delt emphasis we want.
But this is not a rigid rule to force on your shoulders. If that position feels awkward or painful, allow your hands to rotate more naturally, including turning the thumbs upward.
- Rep range: 10 to 20 reps.
- Range: Continue above the usual shoulder-height stopping point.
- Hand position: Keep the pinkie side relatively high when comfortable, but adjust if needed.
- Tempo: Control the entire lowering phase on every rep.
The extended range and deliberate negative make light dumbbells plenty challenging. The goal is not to find a way to heave heavier weights overhead.
My Pick: Cross-Body Cable Y-Raise
My favorite side-delt exercise is the cross-body cable Y-raise. A standard lateral raise goes directly out to the side, and there is nothing wrong with that. What I like about this variation is the stretch at the beginning.
Think about how you would stretch your side delt: you would bring your arm across your body, not simply leave it hanging at your side. This exercise uses that cross-body position as the starting point.
There is also more to shoulder anatomy than three neatly separated heads. Anatomical research on deltoid compartments describes seven segments with differing fiber arrangements. That gives us a reason to explore slightly different movement angles rather than assuming one exact path addresses every part equally.
- Begin with the cable pulling your working arm across the front of your body.
- Adjust your torso position until you feel the stretch in the side delt.
- Sweep your arm upward, outward, and slightly back into a Y-shaped finish.
- Return under control to the cross-body starting position.
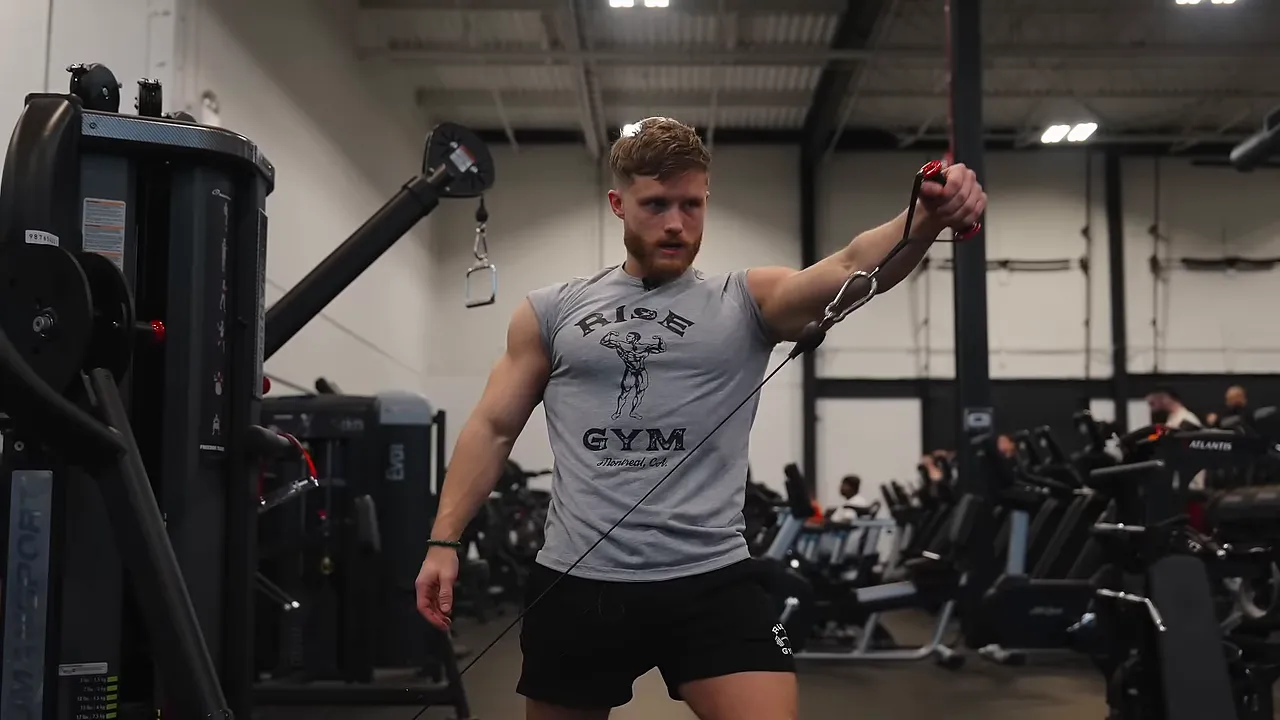
The image I use is drawing a sword and flicking it outward. It is a sweeping motion, not just a straight lift to the side.
Take a little time to find your torso position. The important part is creating the intended side-delt stretch and then maintaining control through that upward and outward path.
Rear Delts: Reverse Pec Deck or Super-ROM Reverse Cable Fly
Mike’s Pick: Super-ROM Reverse Cable Fly
Mike’s rear-delt pick uses a larger range of motion at both ends of a reverse cable fly. The hands cross farther at the front, then the arms travel farther back into the finish.
That creates two useful technique priorities: a substantial stretch at the start and an intentional rear-delt contraction at the end.
- Cross the hands: Let them pass one another rather than stopping as soon as they meet.
- Alternate the overlap: Switch which hand goes above the other on successive sets.
- Keep the elbows straight: Avoid bending the arms and turning the fly into more of a pulling movement.
- Finish farther back: Continue into a comfortable rear-delt contraction rather than automatically stopping with the arms out to the sides.
- Return slowly: Open back into the stretched position under control.
Keeping the elbows straight will reduce how much weight you can use. That is fine. Using less load while making the target muscle work harder is a good trade.
The farther-back finish was a big change for me. I would normally have stopped earlier, but the extra range made the rear-delt contraction much more noticeable.
Mike uses that muscular burning sensation as feedback to help locate the rear delts, then keeps his attention on them during the return. That is different from joint pain, which is not something to chase.
My Pick: Reverse Pec Deck
The reverse pec deck is my top rear-delt exercise, and Mike gave me one of the best cues I have heard for it: reach forward, then sweep outward rather than pulling backward.
Start by reaching far enough forward to pre-stretch the rear delts. From there, imagine your hands are paintbrushes and you are trying to paint the widest possible arc.
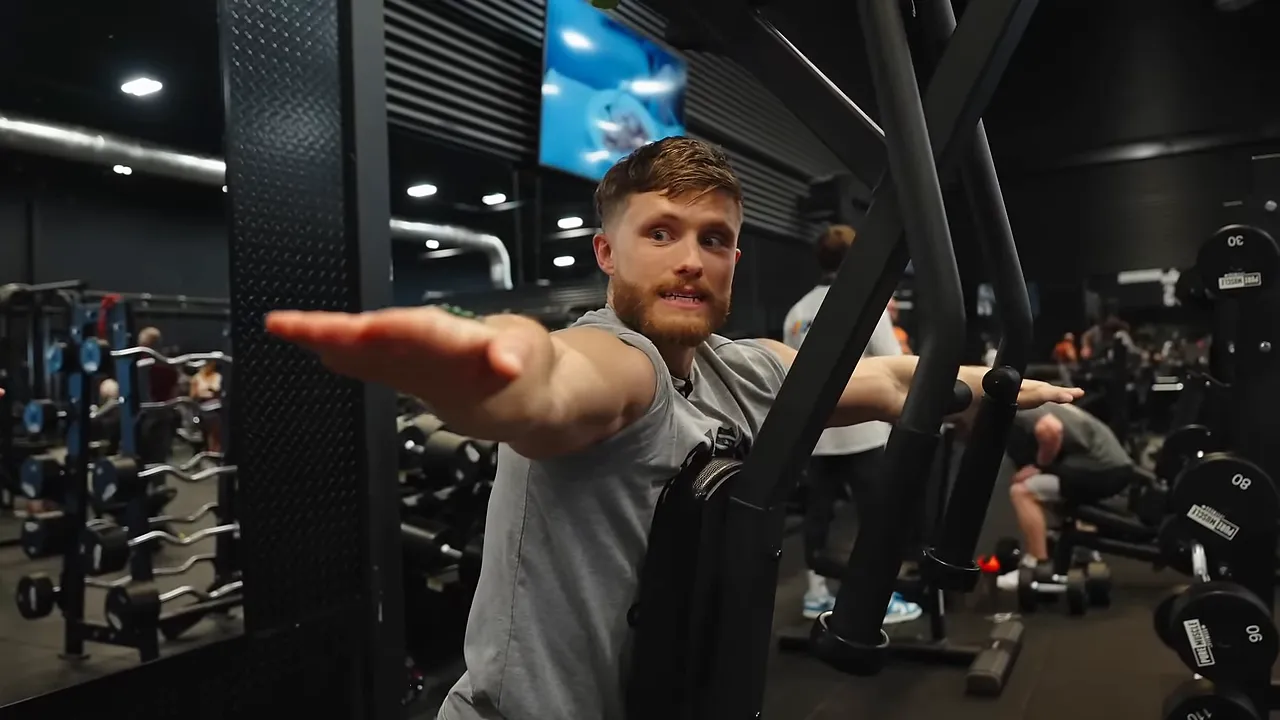
Mike’s more entertaining version is to imagine standing over a pile of money and getting to keep everything your hands can sweep across. Suddenly, shortening the arc does not seem so appealing.
- Reach forward deliberately at the start of the rep.
- Keep the arms long throughout the movement.
- Sweep outward in a broad arc instead of drawing the elbows inward.
- Return to the stretched position with control.
This cue will probably make you lower the weight significantly. It did for me. But the movement becomes much more focused on the rear delts, which is the whole point.
Finish the Last Negative as Carefully as the First
One cue from Mike applies to every exercise here: finish the last rep as though you are going to do another one.
It is easy to complete the lifting portion of the final rep, decide the set is over, and let the weight drop. Instead, maintain the same deliberate lowering technique you would use if another rep were coming.
Control the return. Reach the intended bottom or stretched position. Then end the set.
Mike places particular value on that final eccentric because it is still part of a hard rep. You have already done the difficult work of getting the weight up. There is no reason to throw away the lowering portion.
The Three Exercises I Would Start With
My three picks remain straightforward:
- Front delts: Machine shoulder press, with a seated dumbbell press as an alternative.
- Side delts: Cross-body cable Y-raise.
- Rear delts: Reverse pec deck.
Mike’s EZ-bar front raise, super-ROM lateral raise, and super-ROM reverse cable fly give you useful alternatives with different equipment and movement demands. These are options to choose from, not a requirement to add all six to your program.
For rounder shoulders, give the side delts the attention they deserve, account for the pressing and back work you already do, and make your technique intentional. A controlled stretch, a purposeful sweep, and a complete final negative can make familiar exercises feel entirely new.


